Please install the latest versions of RStudio, and git.
Installation
Windows
- Download at:
https://cran.r-project.org/
Click on Download R for Windows
Click on base
Click on Download R 4.2.0 for Windows
Open R-4.2.0-win.exe and follow instructions
- Download
RStudio Desktopat:
https://www.rstudio.com/products/rstudio/download/#download
Download the version for Windows 10/11 (the .exe and not the .zip)
Open RStudio-2022.02.3-492.exe and follow instructions
Check if RStudio has found . Launch RStudio and run:
R.version.string
## [1] "R version 4.2.0 (2022-04-22)"
- Download
gitat:
https://git-scm.com/downloads
Download the 64-bit version for Windows
Open Git-2.36.1-64-bit.exe and follow instructions
Check if RStudio has found git. Launch RStudio and run:
Sys.which("git")
## C:/Program Files/Git/bin/git.exe
- Download
Rtools4.2at:
https://cran.r-project.org/bin/windows/Rtools/rtools42/rtools.html
Download the 64-bit version for Windows
Open rtools42-5253-5107 and follow instructions
The installation of Rtools4.2 is optional, but this software is required to install packages (from sources) containing compiled code (C/C++/Fortran). Rtools4.2 contains in particular the utility make.
Restart RStudio and check that find the utility make:
Sys.which("make")
## "C:/rtools42/usr/bin/make.exe"
Now you can install packages from sources:
install.packages("jsonlite", type = "source")
- Install
pandoc(optional)
The package rmarkdown requires the software pandoc to convert document from one format (e.g. .Rmd) to another (e.g. .html).
Download the latest version of pandoc at: https://github.com/jgm/pandoc/releases, and follow instructions.
- Install a
LaTeXdistribution (optional)
If you want to convert documents from .Rmd to .pdf, you will need LaTeX. You can install a lightened distribution using the package tinytex. Open RStudio and run:
## Install tinytex ----
install.packages("tinytex")

## Install LaTeX ----
tinytex::install_tinytex()
N.B. If you already have a LaTeX distribution, do not install tinytex.
macOS
Th easiest way to set up your environment is by using the package manager for macOS Homebrew. With this tool you can install (and update) your software directly from the terminal. First you need to install the Apple software Command Line Tools for Xcode.
Open a terminal, run this line and accept the license:
Then you can install Homebrew:
## Install Homebrew ----
/bin/bash -c "$(curl -fsSL https://raw.githubusercontent.com/Homebrew/install/HEAD/install.sh)"

## Check installation ----
brew --version
## Homebrew 3.5.1-24-ga3d14ff

## Update repositories (list of available software) ----
brew update
Follow these lines to install your environment:
## Install utilities for R ----
brew install --cask xquartz     ## Graphical window system
brew install gfortran           ## FORTRAN compiler for GCC

## Install R ----
brew install --cask r

## Install RStudio Desktop ----
brew install --cask rstudio

## Install git ----
brew install git

## Install pandoc ----
brew install pandoc             ## Convert documents (Rmd, html, etc.)
Open RStudio and check your installation:
If you want to convert documents from .Rmd to .pdf, you will need LaTeX. You can install a lightened distribution using the package tinytex. Open RStudio and run:
## Install tinytex ----
install.packages("tinytex")

## Install LaTeX ----
tinytex::install_tinytex()
Congrats! You have successfully install your environment. The following commands will install system libraries (software) required by some packages (sf, sp, rgdal, rgeos, raster, terra, xml, etc.).
## Install other utilities for R (spatial and others) ----
brew install libgit2
brew install libxml2
brew install poppler
brew install geos gdal netcdf proj udunits
To keep your system up-to-date, run regularly:
Ubuntu
First check your version of Ubuntu in a terminal:
| Release | Release name | Repository URL |
|---|---|---|
| 22.04 LTS | Jammy Jellyfish | https://cloud.r-project.org/bin/linux/ubuntu jammy-cran40/ |
| 21.10 | Impish Indri | https://cloud.r-project.org/bin/linux/ubuntu impish-cran40/ |
| 21.04 | Hirsute Hippo | https://cloud.r-project.org/bin/linux/ubuntu hirsute-cran40/ |
| 20.04 LTS | Focal Fossa | https://cloud.r-project.org/bin/linux/ubuntu focal-cran40/ |
| 18.04 LTS | Bionic Beaver | https://cloud.r-project.org/bin/linux/ubuntu bionic-cran40/ |
| 16.04 LTS | Xenial Xerus | https://cloud.r-project.org/bin/linux/ubuntu xenial-cran40/ |
Install by following these steps (change the URL below by the one specific to your version of Ubuntu, cf. Table 1) :
## Install APT utilities ----
sudo apt install software-properties-common

## Add CRAN GPG key ----
sudo apt-key adv --keyserver keyserver.ubuntu.com --recv-keys E298A3A825C0D65DFD57CBB651716619E084DAB9

## Add CRAN repository to APT repositories list ----
sudo add-apt-repository 'deb https://cloud.r-project.org/bin/linux/ubuntu jammy-cran40/'

## Update packages list ----
sudo apt update

## Install R ----
sudo apt install r-base

## Install R (for development, recommended) ----
sudo apt install build-essential
sudo apt install r-base-dev
To install RStudio Desktop visit this page: https://www.rstudio.com/products/rstudio/download/#download, download the .deb file for Ubuntu 18+/Debian 10+ and install it. If you have an older version of Ubuntu (16.04), visit this page: https://www.rstudio.com/products/rstudio/older-versions/
Alternatively, you can install RStudio Desktop from the terminal:
## Install wget utility ----
sudo apt install wget

## Download RStudio Desktop installer (Ubuntu 22.04) ----
wget https://download1.rstudio.org/desktop/jammy/amd64/rstudio-2022.02.3-492-amd64.deb

## Download RStudio Desktop installer (Ubuntu >= 18.04) ----
# wget https://download1.rstudio.org/desktop/bionic/amd64/rstudio-2022.02.1-461-amd64.deb

## Download RStudio Desktop installer (Ubuntu 16.04 only) ----
# wget https://download1.rstudio.org/desktop/xenial/amd64/rstudio-1.4.1106-amd64.deb

## Install RStudio Desktop ----
sudo dpkg -i rstudio-2022.02.3-492-amd64.deb
# sudo dpkg -i rstudio-2022.02.1-461-amd64.deb
# sudo dpkg -i rstudio-1.4.1106-amd64.deb

## Remove installer ----
rm rstudio-2022.02.3-492-amd64.deb
# rm rstudio-2022.02.1-461-amd64.deb
# rm rstudio-1.4.1106-amd64.deb
Now let’s install git:
Finally, install pandoc (to convert documents using rmarkdown):
Open RStudio and check your installation:
If you want to convert documents from .Rmd to .pdf, you will need LaTeX. You can install a lightened distribution using the package tinytex. Open RStudio and run:
## Install tinytex ----
install.packages("tinytex")

## Install LaTeX ----
tinytex::install_tinytex()
Congrats! You have successfully install your environment. The following commands will install system libraries (software) required by some packages (sf, sp, rgdal, rgeos, raster, terra, xml, etc.).
## Install other utilities for R (spatial and others) ----
sudo apt install libgdal-dev libproj-dev libgeos-dev libudunits2-dev libnetcdf-dev
sudo apt install libcairo2-dev libmagick++-dev
sudo apt install libpoppler-cpp-dev
To keep your system up-to-date, do not forget to frequently run:
Configuration
git
To use git, you need to store your credentials (user name and email) that will be added to all your commits. Open a terminal (you can use the terminal of RStudio) and run:
When you create a new git project the default branch will be named master. It’s recommended to replace master by main (for more information read this article).
On a terminal, run:
From now when you will initialize git in a new project the default branch will be main.
GitHub SSH keys
To communicate with GitHub, you can use the protocol HTTPS (default) or the protocol SSH (recommended). The protocol SSH is a more secure method of logging into a remote server (GitHub). To use this protocol, you need to generate an SSH keys pair that consists in creating two long strings of characters: a public key and a private key. You can place the public key on any server (for instance GitHub), and then connect to the server using a device (your laptop) that has access to the private key.
To generate a new SSH keys pair proceed as follow:
Create an account on GitHub at https://github.com/signup (if not already done)
Open RStudio and click on: Tools > Global options > Git/SVN
Click on Create RSA Key and then click on Create (you can omit the passphrase). This new SSH keys pair has been stored in ~/.ssh/.
Click on View public key and copy it
Go to the page https://github.com/settings/keys and click on New SSH key
Choose a name for your key (e.g. your laptop name) and paste your public key
Finally click on Add SSH key
If you are on Ubuntu you need to install the following utility:
Let’s test the SSH connection to GitHub. Open a terminal and run (you need to accept the fingerprint, just enter yes):
Congrats! You can now communicate with GitHub using the SSH protocol.
From now, you need to use the SSH URL when connecting a new GitHub project (named remote).
## URL HTTPS ----
https://github.com/frbcesab/workshop-free.git

## URL SSH (use this one) ----
git@github.com:frbcesab/workshop-free.git
If you lose your private SSH key you won’t be able to establish a connection with GitHub. You’ll need to delete your SSH key on GitHub and to create a new one.
GitHub PAT
If you want to use the GitHub API, essentially with the package usethis, you need to create a GitHub Personal Access Token (PAT).
Go to https://github.com/settings/tokens
Click on Generate new token
Choose a name for your new token (e.g. your laptop name)
In the section scopes, select at least repo and workflow
Copy this token.
Then open RStudio and run:
## Install usethis package ----
install.packages("usethis")

## Open ~/.Renviron file ----
usethis::edit_r_environ()
## • Modify '~/.Renviron'
## • Restart R for changes to take effect
In the ~/.Renviron file, add this new line: GITHUB_PAT='XXX' where XXX is your token. Do not forget to restart .
Finally let’s tell usethis to use the SSH protocol. Open RStudio and run:
## Open ~/.Rprofile file ----
usethis::edit_r_profile()
## • Modify '~/.Rprofile'
## • Restart R for changes to take effect
In the ~/.Rprofile file, add this new line: options(usethis.protocol = "ssh"). Do not forget to restart .
For the workshop
You will need to install the following R packages:
## CRAN packages ----
pkgs <- c("funrar", "mFD")
install.packages(pkgs)
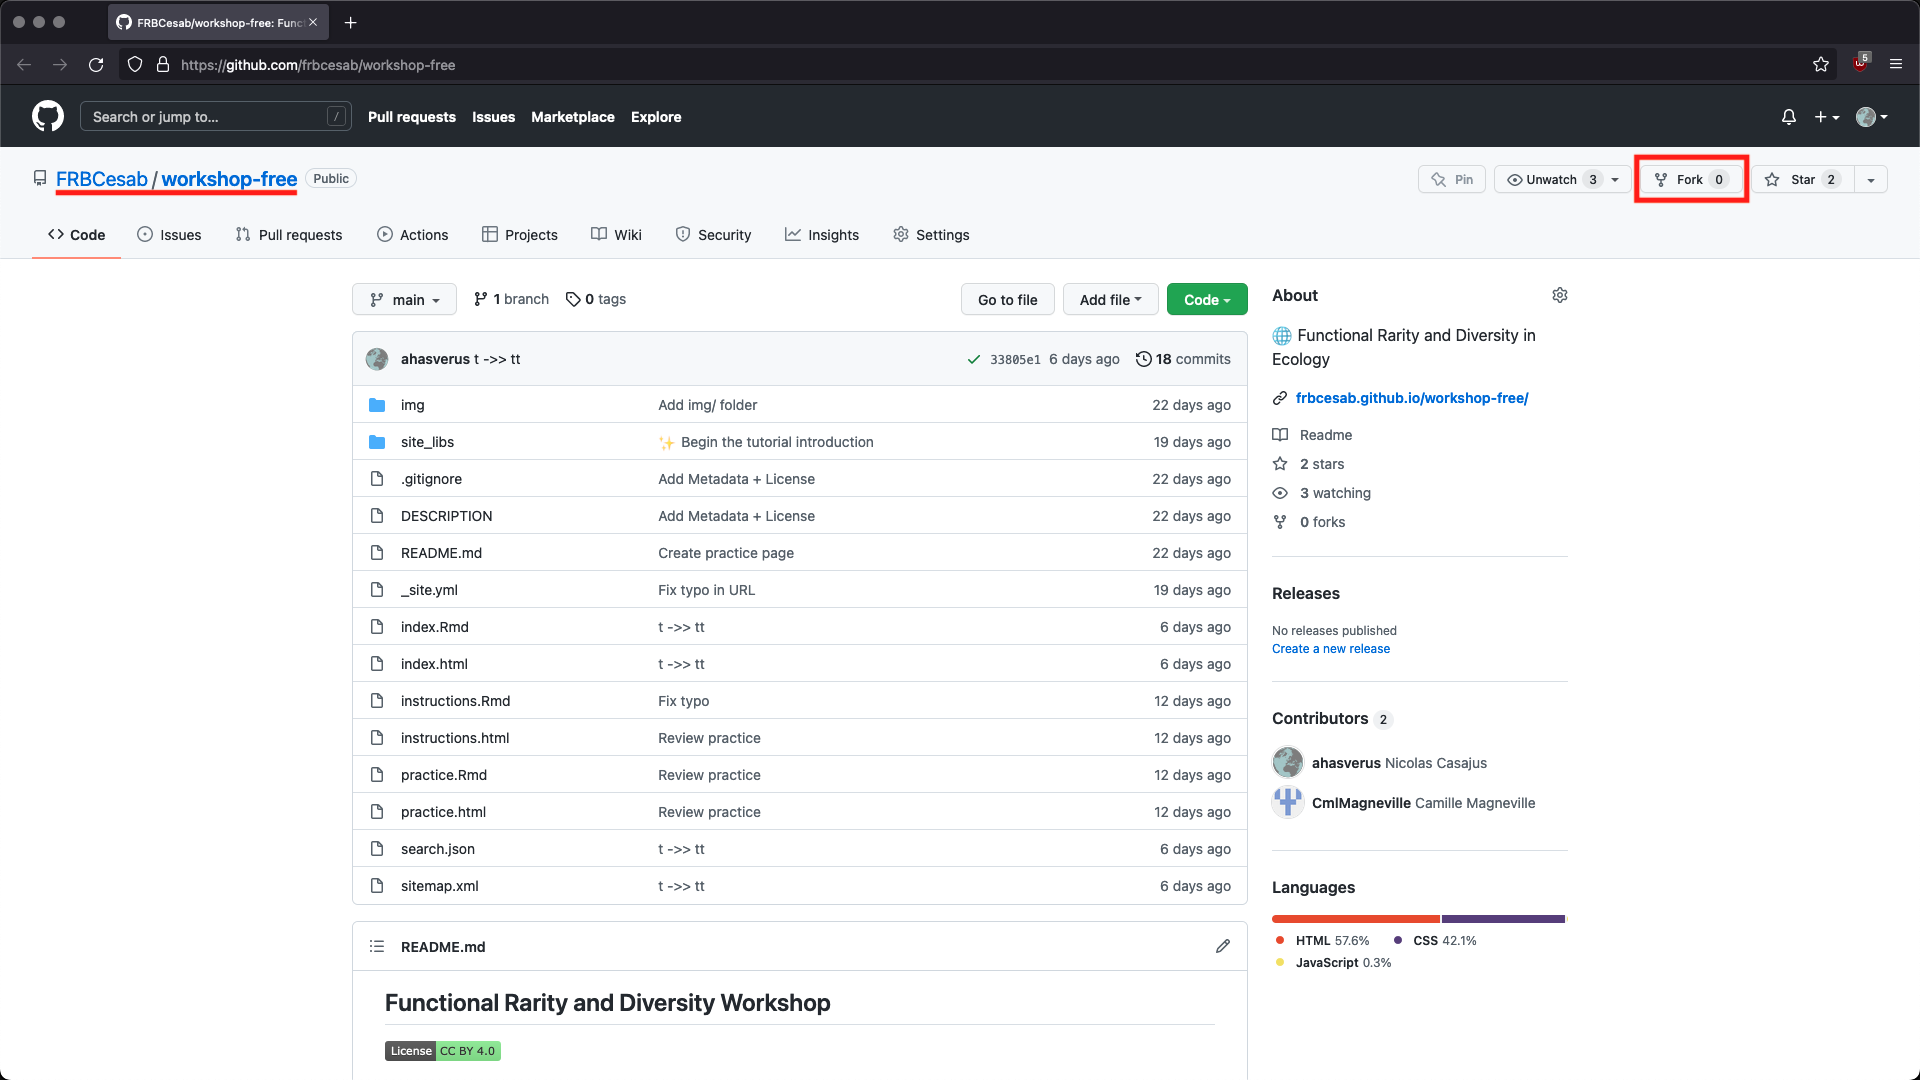
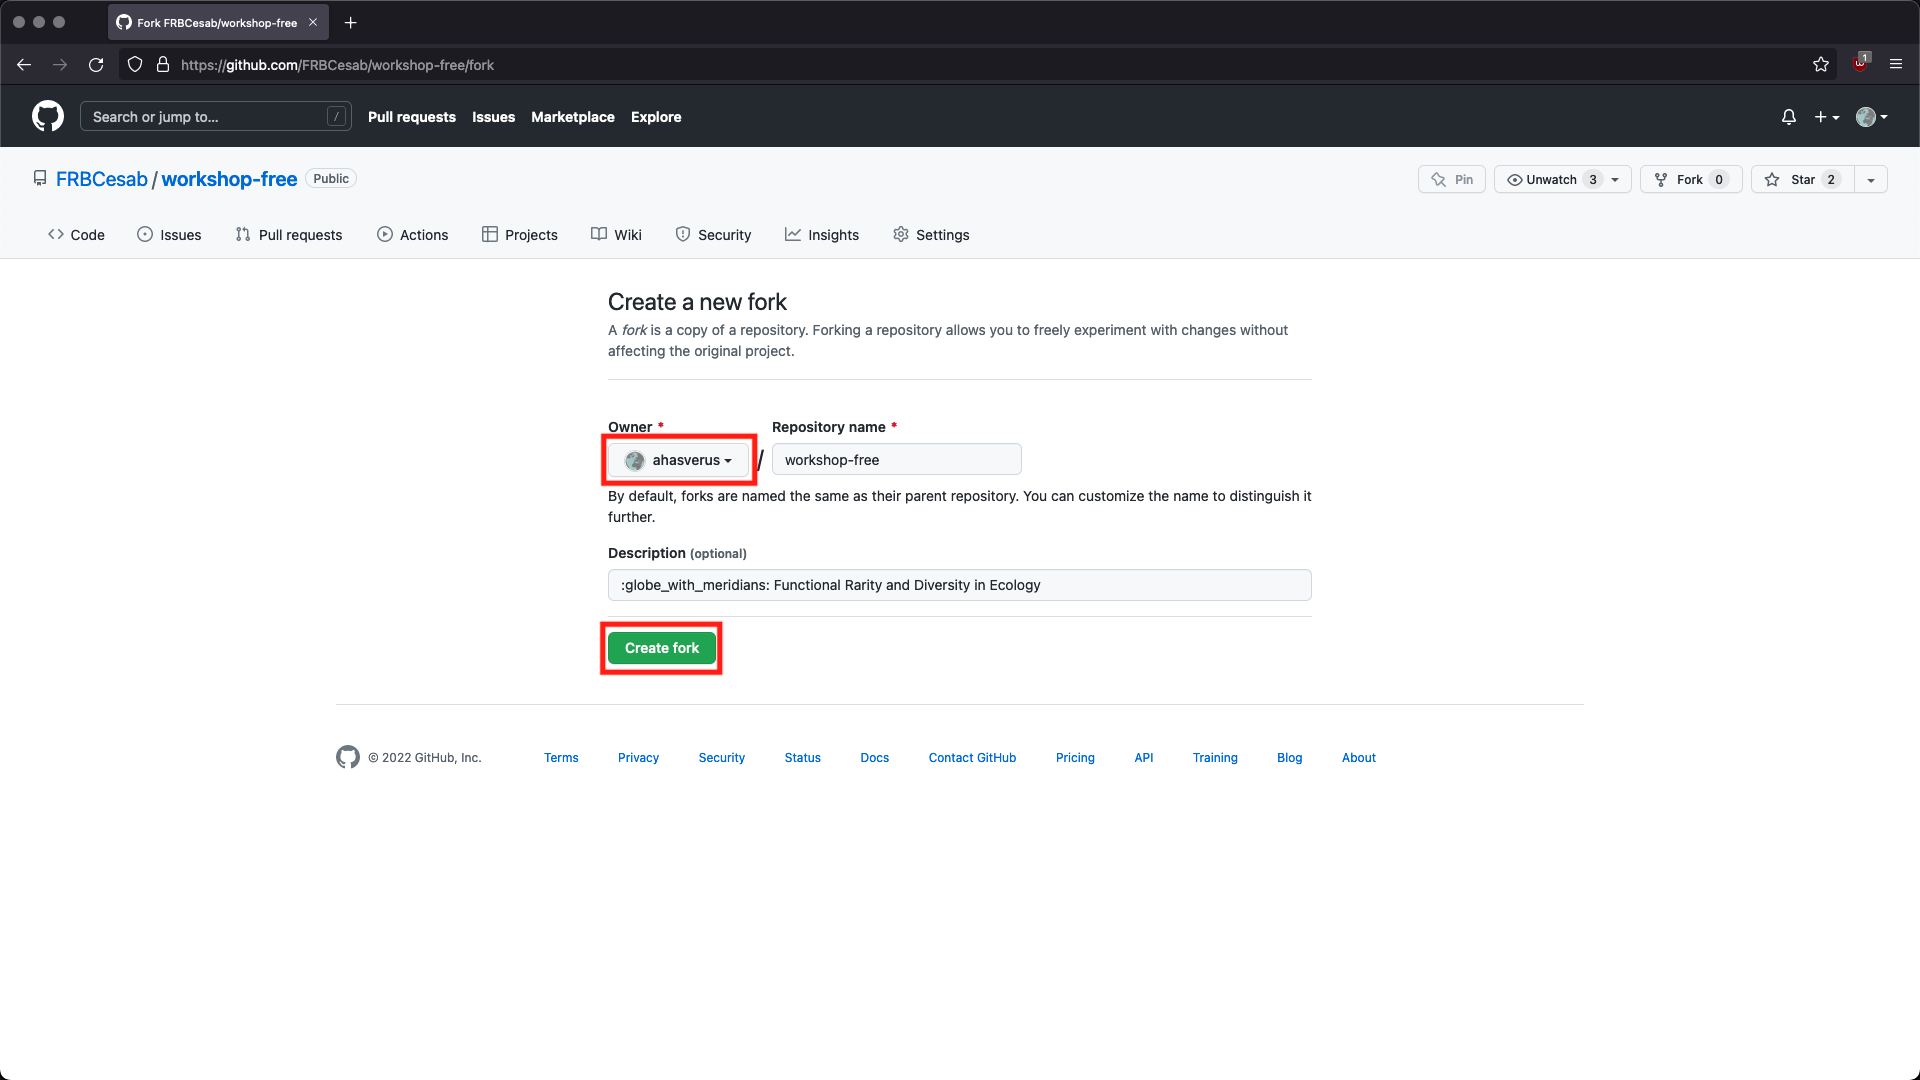
In addition, you must download a copy of the content of the workshop. We recommend that you create a copy (fork) of the GitHub repository of the workshop on your GitHub space. Then, using RStudio you will clone (download) your fork.
Go to the GitHub URL of the workshop repository: https://github.com/frbcesab/workshop-free. Then follow these instructions to fork the repository.


Then open RStudio Desktop and follow these instructions to create a new project from your GitHub repository (fork of the original repository)
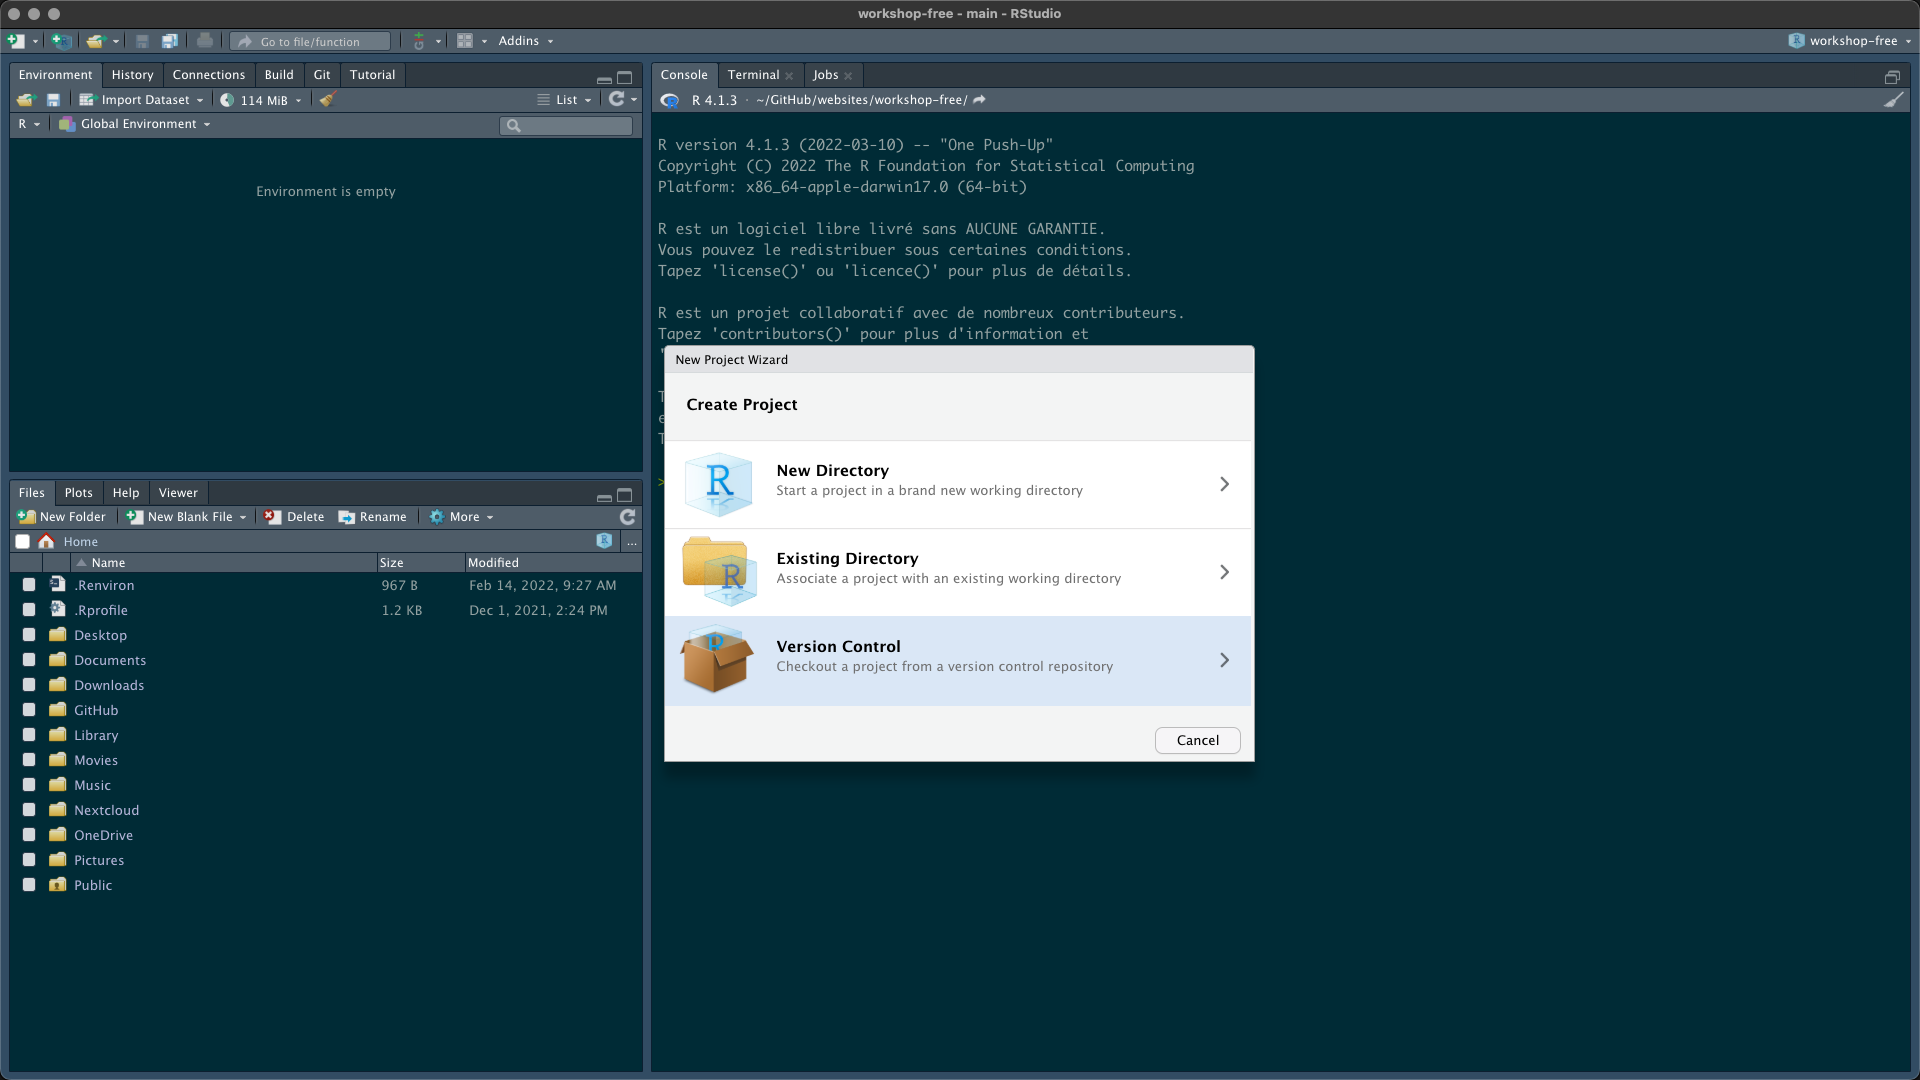
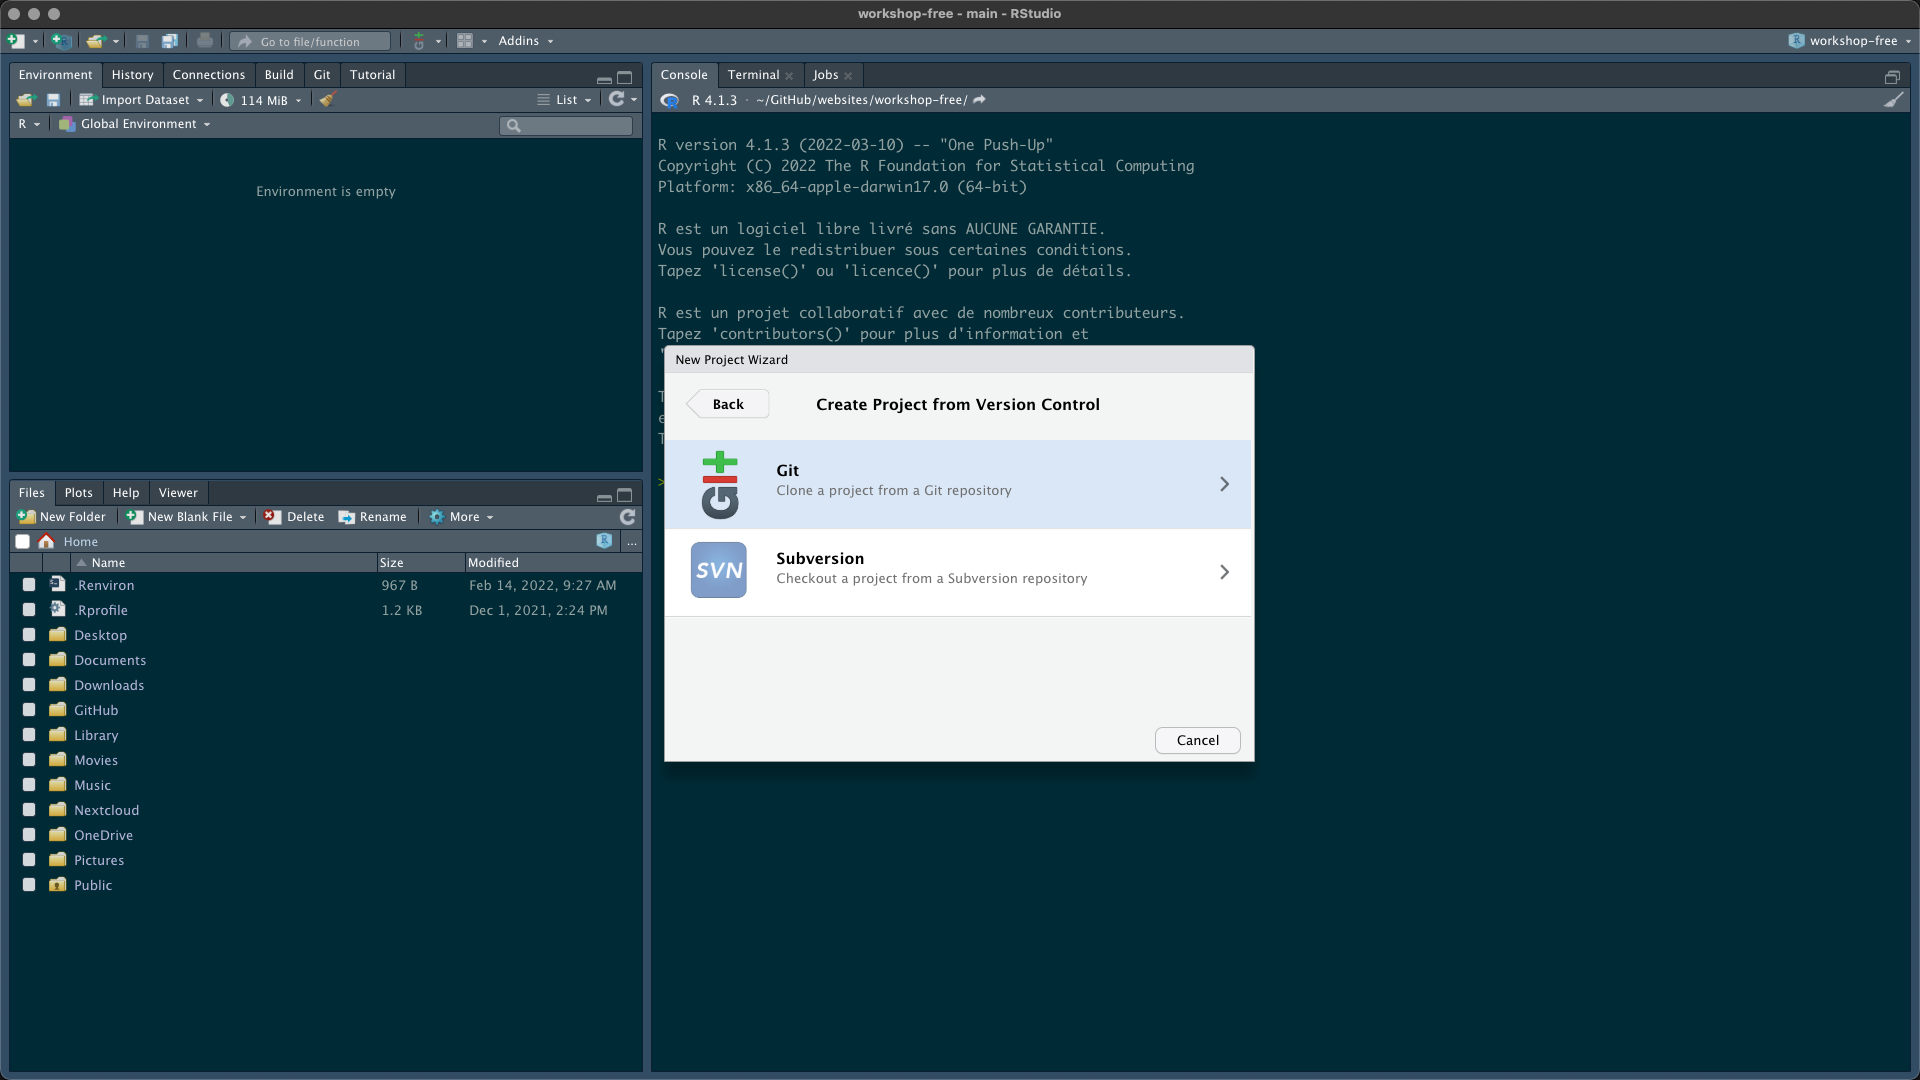

Congrats! You have your own copy of the workshop content (data, instructions and courses). If you want you can use git to commit changes during the workshop and send these modifications to your GitHub repository.
Corrections
If you see mistakes or want to suggest changes, please Create an issue on the source repository.
Reuse
The material of this website is licensed under Creative Commons Attribution CC BY 4.0. Source code is available at https://github.com/frbcesab/workshop-free/.
Citation
Casajus N, Grenié M, Magneville C & Villéger S (2022) Workshop FRB-CESAB & FREE Working Group: Functional Rarity and Diversity in Ecology.